Connect to a MySQL database using SSH Tunnelling
We will be using Bitvise Tunnelier, which you can download and install here: http://www.bitvise.com/tunnelier-download
- Under the Login tab, enter in the following information --
- Server Host: Your Domain Name
- Username: The cPanel username for your account
- Password: The cPanel password for that account
- Change the Initial Method to "password"
- Tick the box for Store encrypted password in profile

- Under the Options tab untick Open Terminal and Open SFTP
- Under the C2S Fwding tab you will need to add some details about the connection forwarding.
Click the Add button and enter these details:
enabled 127.0.0.1 3306 DomainName 3306 MySQL
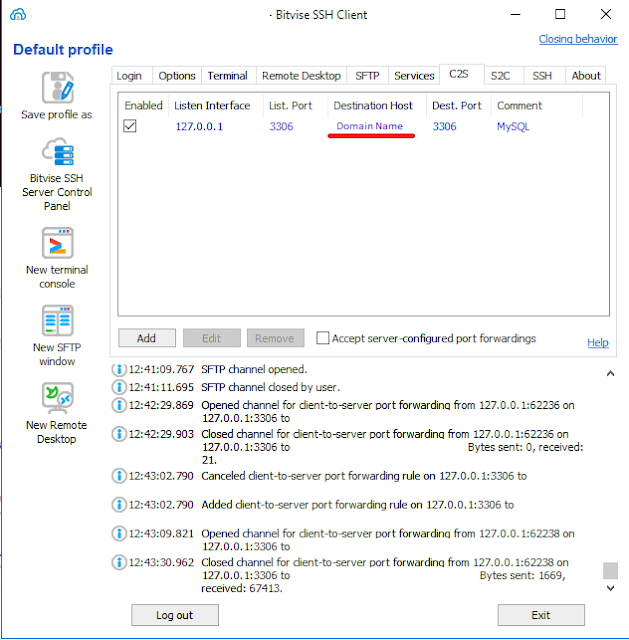
- However, if for some reason that you are running a MySQL server on your PC (you probably are not), then change "List. Port" to 3308 for example
- You are now ready to connect to your Web Hosting Account using the SSH tunnel.
Click the Login button on the bottom left-hand side of the program. - Click the Accept and Save button when the Host Key Verification window when it pops up
You will now be able to see the results of your connection attempt in the Log window. After the connection has been established, load whichever program that you are using to access your databases and configure it to connect to localhost (or 127.0.0.1) on port 3306 (or port 3308 if you set it to that instead).
 Click the Logout button to close the connection.
Click the Logout button to close the connection.
Comments
Post a Comment